其实我们的生产环境一直是 KVM ,然后用 shell 脚本控制虚机的生成,也是用到了 Cloud-init 的标准镜像。
听说 Proxmox 也很不错,于是想看看能否也在生产环境中用上
如果在生产环境中用,必须要让 proxmox 支持 cloud-init ,否则无意义,下面也说一下跑在生产的注意事项
首先我们用光盘安装:
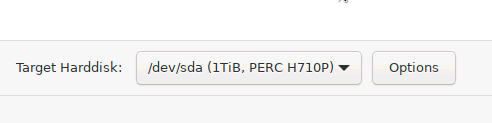
然后第一个注意的地方就是硬盘,选 Options 后:
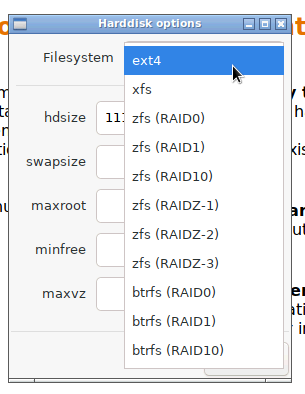
会冒出一堆选项,公司的生产环境,服务器如果没有 raid 卡是很奇怪的,所以 zfs 反而不是标配,因为我们会事先在 raid 卡上划分好硬盘,生产环境基本必然是 raid10 ,接下来就是 ext4 和 xfs 二选一了,八戒选 ext4 ,因为坏了好修理,xfs_repair 用起来相当龟毛:
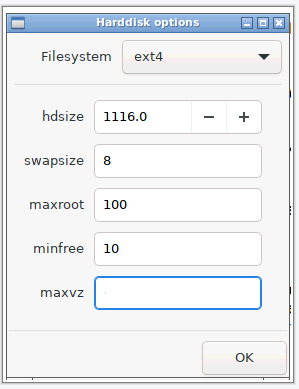
那么,选定了 ext4 ,接下来就比较重要了
-
hdsize 1116.0 ,单位是G,这个是自动收集上来的,不用改
-
swapsize,交换分区大小,这个给 8 G(最大8G)
-
maxroot,这个分区是第一个分区,存放 iso 和 template 的,需要给够,100 G
-
minfree,第一个分区最小留多大,给 10 G(缺省16G)
-
maxvz,这个分区是第二个分区,存放实际的虚机文件,全都用上,什么也不填写
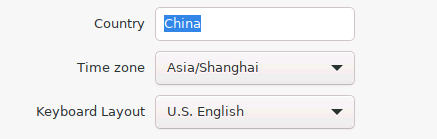
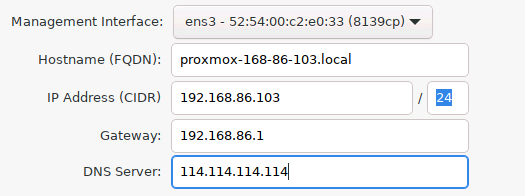
然后继续,国家选 china,Hostname 填写 proxmox-168-86-103.local,再填写好其他信息,就安装成功了。
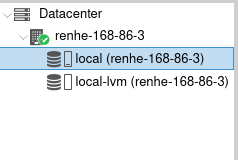
打开网页,我们可以看到一个 local,100G,对应上面的 maxroot
然后 local-lvm ,就是剩余放虚机的空间
ssh登录系统,首先换成中科大的 apt 源,并升级一下系统:
1sed -i 's|^deb http://ftp.debian.org|deb https://mirrors.ustc.edu.cn|g' /etc/apt/sources.list
2sed -i 's|^deb http://security.debian.org|deb https://mirrors.ustc.edu.cn/debian-security|g' /etc/apt/sources.list
3CODENAME=`cat /etc/os-release |grep CODENAME |cut -f 2 -d "="`
4echo "deb https://mirrors.ustc.edu.cn/proxmox/debian $CODENAME pve-no-subscription" > /etc/apt/sources.list.d/pve-no-subscription.list
5cat /etc/apt/sources.list.d/pve-no-subscription.list
6rm /etc/apt/sources.list.d/pve-enterprise.list
7apt update
8apt upgrade
那生产使用,是必须用 Cloud-init 的标准化镜像的。我们需要造出一个 template 。
以 Centos7 为例子
1wget http://cloud.centos.org/centos/7/images/CentOS-7-x86_64-GenericCloud.qcow2
2apt-get install libguestfs-tools
然后准备脚本 modify.sh :
 1#!/bin/sh
 2image_name=CentOS-7-x86_64-GenericCloud.qcow2
 3# virt-edit -a ${image_name} /etc/cloud/cloud.cfg
 4virt-edit -a ${image_name} /etc/cloud/cloud.cfg -e 's/disable_root: [Tt]rue/disable_root: False/'
 5virt-edit -a ${image_name} /etc/cloud/cloud.cfg -e 's/disable_root: 1/disable_root: 0/'
 6virt-edit -a ${image_name} /etc/cloud/cloud.cfg -e 's/lock_passwd: [Tt]rue/lock_passwd: False/'
 7virt-edit -a ${image_name} /etc/cloud/cloud.cfg -e 's/lock_passwd: 1/lock_passwd: 0/'
 8virt-edit -a ${image_name} /etc/cloud/cloud.cfg -e 's/ssh_pwauth:   0/ssh_pwauth:   1/'
 9virt-edit -a ${image_name} /etc/ssh/sshd_config -e 's/PasswordAuthentication no/PasswordAuthentication yes/'
10virt-edit -a ${image_name} /etc/ssh/sshd_config -e 's/PermitRootLogin [Nn]o/PermitRootLogin yes/'
11virt-edit -a ${image_name} /etc/ssh/sshd_config -e 's/#PermitRootLogin [Yy]es/PermitRootLogin yes/'
12virt-edit -a ${image_name} /etc/ssh/sshd_config -e 's/#PermitRootLogin prohibit-password/PermitRootLogin yes/'
13virt-edit -a ${image_name} /etc/ssh/sshd_config -e 's/[#M]axAuthTries 6/MaxAuthTries 20/'
14virt-customize --install cloud-init,atop,htop,nano,vim,qemu-guest-agent,curl,wget,telnet,lsof,screen -a ${image_name}
运行它,以上命令其实是侵入镜像,修改 sshd_config 允许 root 用 password 登录,然后又安了几个常用软件,大家可以按需修改。
最后生成 template , 脚本: vm.sh
 1#!/bin/sh
 2vm_id=9999
 3image_name=CentOS-7-x86_64-GenericCloud.qcow2
 4
 5qm create ${vm_id} --memory 8196 --net0 virtio,bridge=vmbr0
 6qm importdisk ${vm_id} ${image_name} local-lvm
 7qm set ${vm_id} --scsihw virtio-scsi-pci --scsi0 local-lvm:vm-${vm_id}-disk-0
 8qm set ${vm_id} --ide2 local-lvm:cloudinit
 9qm set ${vm_id} --boot c --bootdisk scsi0
10qm set ${vm_id} --serial0 socket --vga serial0
11qm template ${vm_id}
cloud-init 技术的核心其实就是用配置文件,在虚机启动的时候动态修改,这里把配置放到了 ide2 的一个虚拟 cdrom 中
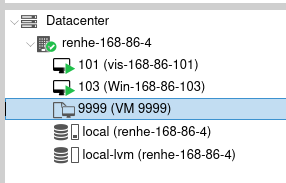
最终会生成一个 id 为 9999 的 template
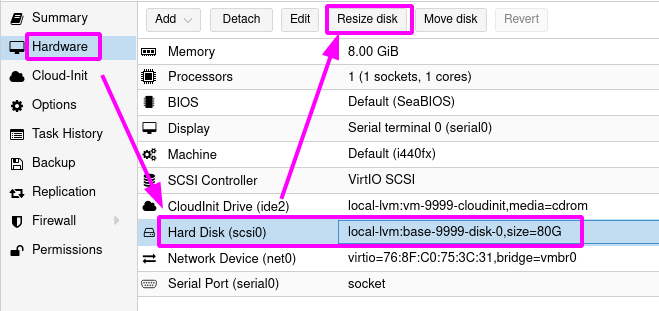
我们还需要改两处:
一是 CPU、MEMORY、硬盘大小,缺省是 8G,我们生产的镜像标配是80G,需要 resize , 加 72G,合计80G
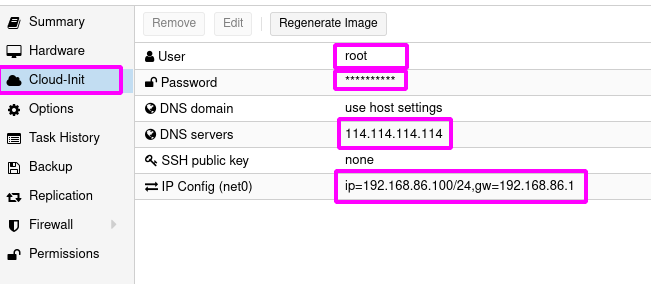
二是 cloud-init 部分,用户名、密码、DNS、IP、MASK、GATEWAY
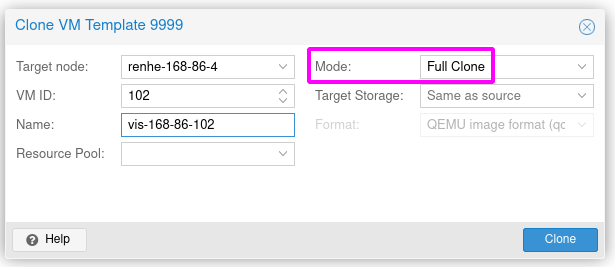
这样这个 template 就做好了,在生产的时候,只需要 clone 这个模板(模式要选 Full Clone),然后记得修改为不同的IP,就可以了。
总体来说,这个东西偏小白,对于习惯了 KVM 的人来说,反而不如脚本来的快。
相关文档:https://whattheserver.com/proxmox-cloud-init-os-template-creation/